
AURA

Platform:
PC
Engine:
Unity Engine
Duration:
6 months
Completion:
2021
Team Size:
3
Tools:
Visual Studio, Unity Collab
Programming Languages:
C#, JavaScript, PHP
My Roles:
Lead Programmer, Gameplay Programmer, UI Programmer, Narrative Designer, Game Designer
Project Synopsis
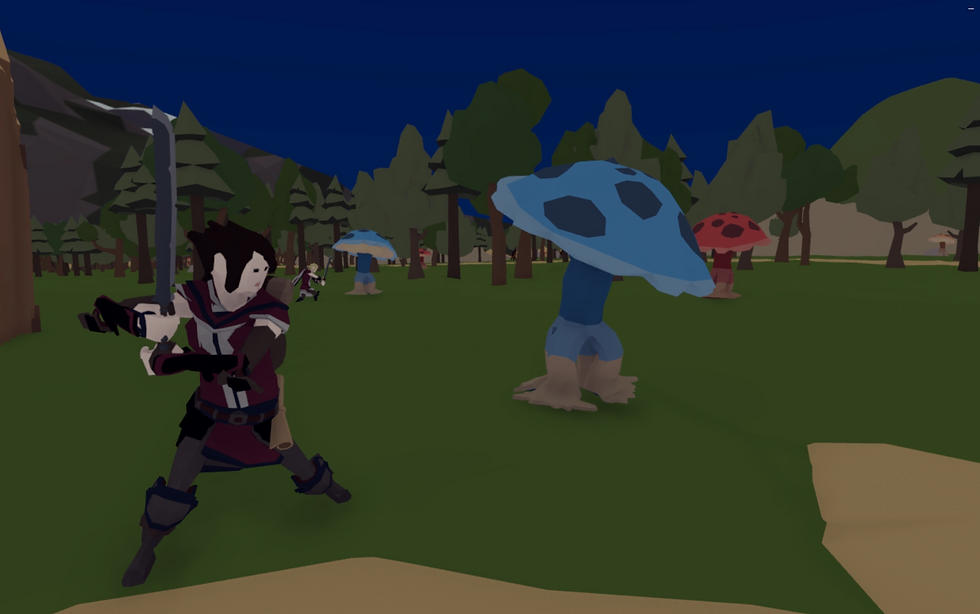
In AURA, players take on the role of a young village guard facing a growing threat. Mysterious disappearances and aggressive monster sightings have unsettled the villagers, and tensions escalate when an unexpected invasion strikes. Amid the chaos, the guard notices a strange aura surrounding the creatures, hinting at a deeper mystery.
Rumors spread of an imprisoned sorcerer who may have escaped, leading the player on a mission to uncover the truth. This journey takes them through abandoned mines, now overrun with danger. Armed with a mix of melee combat and elemental magic, they must adapt their strategy to survive. As they unravel hidden secrets, the fate of their home hangs in the balance.
My Tasks Included:
-
Oversaw project timelines and deliverables, ensuring smooth development progress and meeting key milestones.
-
Coordinated a team, optimizing workflows and maintaining deadlines to enhance efficiency.
-
Wrote the game's storyline, crafting an engaging narrative that deepens player immersion.
-
Developed an inventory system, streamlining item management and improving accessibility.
-
Integrated UI elements and sound effects, enhancing user experience and reinforcing game atmosphere.
-
Implemented a shop system, allowing seamless item transactions and player progression.
-
Created a comprehensive mission system, structuring main and side quests for clear objectives and deeper engagement.

-
Created character selection and customization features, providing player agency and personalization.
-
Built a dialogue system, enabling dynamic NPC interactions and branching conversations.
-
Created a navigable map, facilitating exploration and guiding player progression.
-
Created cutscenes, improving narrative delivery and emotional engagement.
-
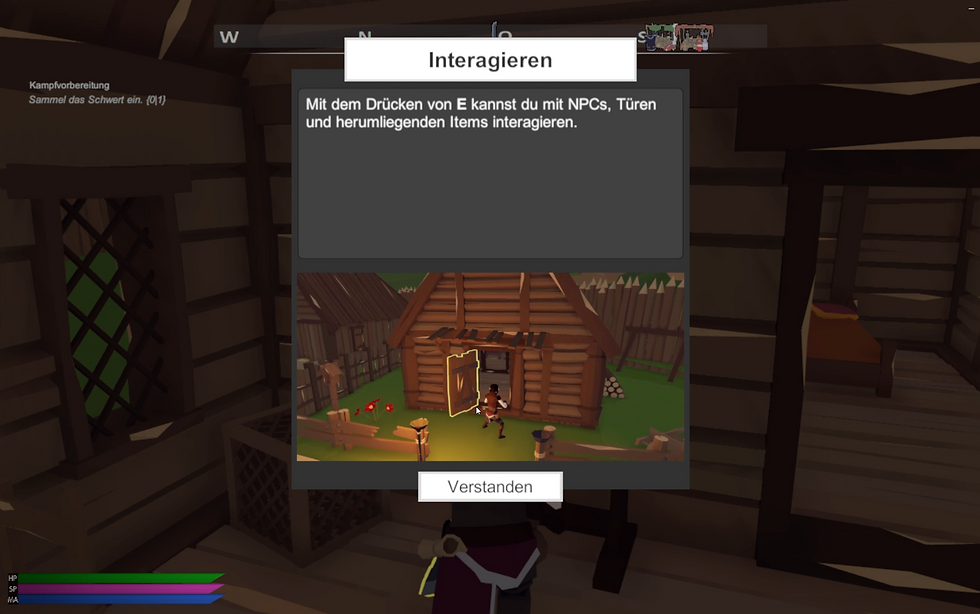
Created an interaction system, fostering immersive gameplay and responsive mechanics.
-
Developed tutorials, ensuring smooth onboarding and clear understanding of core mechanics.
-

Character Customization
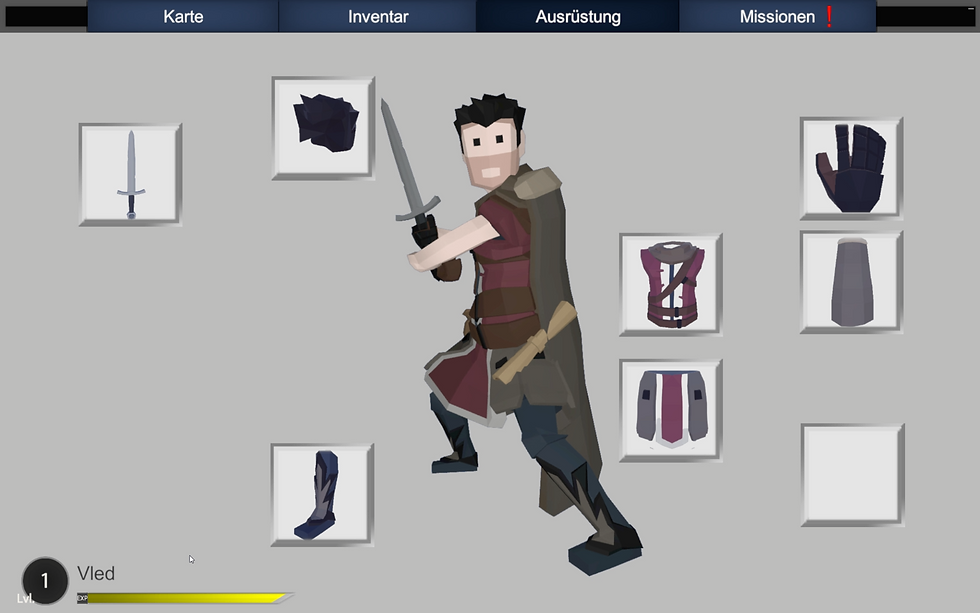
The character customization system of the game offers the player a flexible and personalized experience. At the start of the game, players choose whether they want to play as a male or female character.
The player's gender selection is saved and determines which clothing options are available in the game. There is a single merchant who sells clothing, and based on the player's choice, only items available for selected gender are displayed in the shop. From there, the customization extends further, allowing players to design their own outfit throughout the game. They can purchase individual clothing items such as gloves, shoes, back accessories like cloaks, headgear, tops, and pants, offering the freedom to mix and match various pieces rather than being limited to pre-defined outfits.
To make this system work, I utilized Scriptable Objects to define each clothing item and its corresponding properties. I also adapted the character’s mesh to accommodate all clothing items, ensuring that each piece is deactivated by default and positioned correctly on the character’s body. When the player selects a clothing item, a script identifies which specific object in the mesh corresponds to that item, activates it, and deactivates the previous piece of clothing. This seamless system allows for a dynamic and user-friendly character customization experience, where players can easily switch between various pieces of clothing, creating their desired look without any restrictions.

UI displaying the character's current equipment and options to equip or remove items.
Character Selection UI at the start of the game.

UI displaying the character's current equipment and options to equip or remove items.
Two characters encounter an injured raccoon, triggered by an earlier player decision.
Character Selection UI at the start of the game.
Map & Compass
The compass is a central element of the game's HUD, prominently displayed at the top-center of the screen. It provides directional feedback by showing the player the current camera orientation and highlighting the relative positions of important points of interest, such as merchants or NPCs with available missions. These points of interest are represented by icons that move dynamically along the compass based on their location relative to the player.
The map complements the compass by offering a detailed overview of the game's world. Players can interact with the map to mark locations, either by selecting existing points of interest or by placing a custom waypoint. Marking a location causes its icon on the compass to either glow yellow (if it already exists) or display a newly added icon specifically designed for waypoint navigation. Above the waypoint icon, the distance to the target is displayed in real time, providing players with an intuitive way to gauge how far they need to travel.
Icons for points of interest are displayed differently depending on their distance from the player. Objects farther away appear as small icons on the compass. As the player approaches, the icons gradually increase in size, creating a sense of proximity and focus. If the object is explicitly marked on the map, its icon remains at maximum size on the compass, regardless of distance. Once the marked object comes into view, it is further highlighted in the game world by a yellow particle effect, which follows the object wherever it moves, ensuring that players can easily identify it.
To enable the display of icons on both the map and the compass, each point of interest is equipped with a child object containing a sprite icon.
Map in a top-down view, where players can navigate using the mouse.
Enemies surrounded by a yellow circle, indicating a selected objective from the map, also marked on the compass.
Map in a top-down view, where players can navigate using the mouse.
Enemies surrounded by a yellow circle, indicating a selected objective from the map, also marked on the compass.
The game employs a layering system to control visibility: the main game camera ignores this specific layer, while the map’s top-down camera is configured to render only this layer, making the icons visible on the map.
To optimize performance, the positions of map icons are updated only when the map is open. This selective updating reduces unnecessary calculations, which is particularly important for dynamic objects that move throughout the game world. On the other hand, the compass requires real-time updates to maintain accuracy. The compass continuously adjusts icon positions as the player moves and rotates the camera. This involves a calculation based on the player’s current position and forward direction, ensuring that icons are always correctly aligned with the object’s relative location in the world.
Missions
In the game, missions are divided into main quests and side quests. The main quests drive the core narrative, while the side quests are optional tasks given by NPCs scattered throughout the village. These side missions offer players the chance to explore more of the game world and engage in additional activities that can provide rewards or unlock further story elements.
In the game, completing missions can have a direct impact on the world, making the player's actions feel meaningful and dynamic. For example, fulfilling a mission that involves collecting specific items for an NPC might lead to that NPC opening a stand at the marketplace. Initially, the stand appears empty, but once the mission is completed, the collected items are visually placed in the stand, providing a tangible reward for the player’s efforts.
The tasks required for each mission vary, and can include actions such as collecting specific items, defeating a certain number of monsters, or traveling to particular locations. These objectives are managed using Scriptable Objects, which store key mission data such as the number of items to be found or the type and number of monsters to be defeated.
For missions that require the player to visit a specific location, invisible objects are placed in the world.

UI displaying current main and side missions, including descriptions and rewards.

The player speaks with an NPC to accept a side mission.
UI displaying current main and side missions, including descriptions and rewards.
The player speaks with an NPC to accept a side mission.
As the player moves through one of them, the object checks if the mission related to that location is active in the player’s quest log. If the mission is active, the progress is updated accordingly, ensuring the player’s actions are tracked seamlessly within the game world. This system provides a modular and flexible way of managing missions, allowing for easy adjustments and additions to the game's objectives as needed.
Save System
The save system in AURA is designed to give players complete control over when and how they save their progress, with the only restriction being during cutscenes. The system allows for multiple save slots, letting players create and manage different save files. Each time a player saves, the game creates a text file containing all relevant information about the current game state.
This is achieved by organizing all the variables that need to be saved into a separate script dedicated solely to managing this data. These variables include player position, inventory, mission progress, and other essential game states. When the save process is initiated, this data is encapsulated into a structured object, serialized into a JSON string, and written to a text file within a specific directory. The use of Unity’s JsonUtility for serialization ensures the process is efficient and the saved data is human-readable for debugging purposes.
When a player chooses to load a specific save, the system retrieves the corresponding text file and reads its contents. Unity’s JsonUtility.ToJson() converts the object into a structured string format, which can later be read and applied back to the game.
As the data is being processed and applied to in-game objects, a loading screen conceals the process from the player, ensuring a smooth transition.
UI response when selecting a save slot to save the game.
Notification with a request to confirm the overwriting of existing save data.
This ensures that the player remains immersed and unaware of the technical processes occurring in the background. By combining modular scripting, efficient serialization, and a user-friendly interface, this save system provides both flexibility for developers and convenience for players.
Quick-Time-Event, where pressing the correct key at the right moment alters the outcome.
Quick-Time-Event, where the player must press a key multiple times quickly.
UI response when selecting a save slot to save the game.
Notification with a request to confirm the overwriting of existing save data.
Quick-Time-Event, where the player must press a key multiple times quickly.
Quick-Time-Event, where pressing the correct key at the right moment alters the outcome.
Shop & Merchants
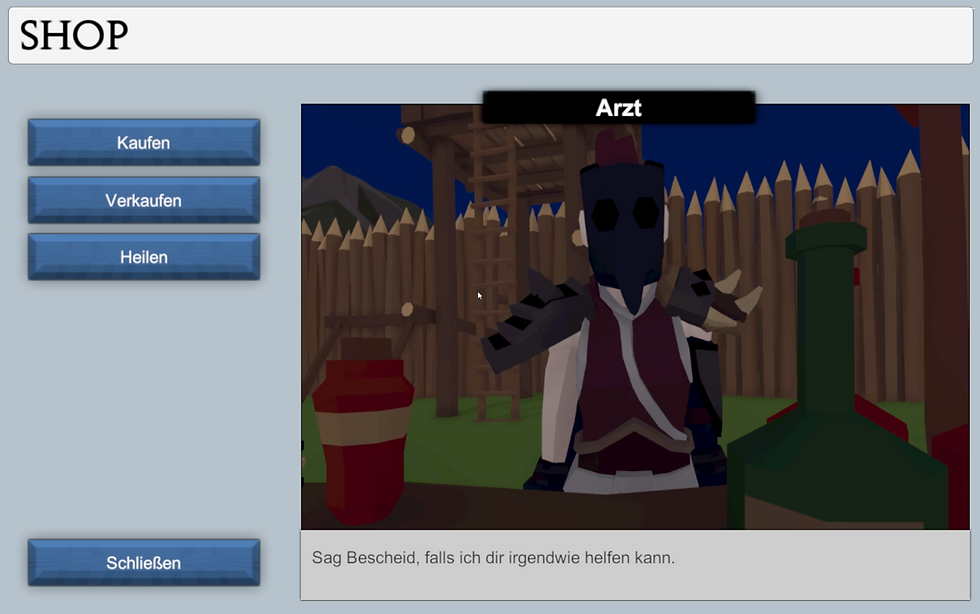
The game features a variety of merchants, each specializing in different types of items such as weapons, food, and potions. The inventory of each merchant is predefined, reflecting their role through names like "Blacksmith" or "Doctor." To efficiently manage these inventories and maintain flexibility, Scriptable Objects were utilized. This approach allows for easy assignment of item lists, streamlined updates, and consistent management across all merchants.
Merchants offer more than just buying and selling items. Players can also complete quests that involve specific merchants or, in the case of doctors, pay a fee in gold to fully restore their health and mana bars. The shopping interface remains consistent for all merchants.
The interface itself is divided into key sections:
On the left side, it displays a list of available items, which varies based on whether the player is buying or selling. When buying, the list shows the merchant’s inventory, while selling displays the player’s inventory of sellable items. Quest items are never shown here, as they cannot be sold.
At the center of the screen, players can view a rotating 3D preview of the selected item, implemented using Unity’s Render Texture system. This system works by rendering a specific camera's view directly onto a texture. A dedicated camera focuses on the item, which is assigned a unique layer and continuously rotated via a script.
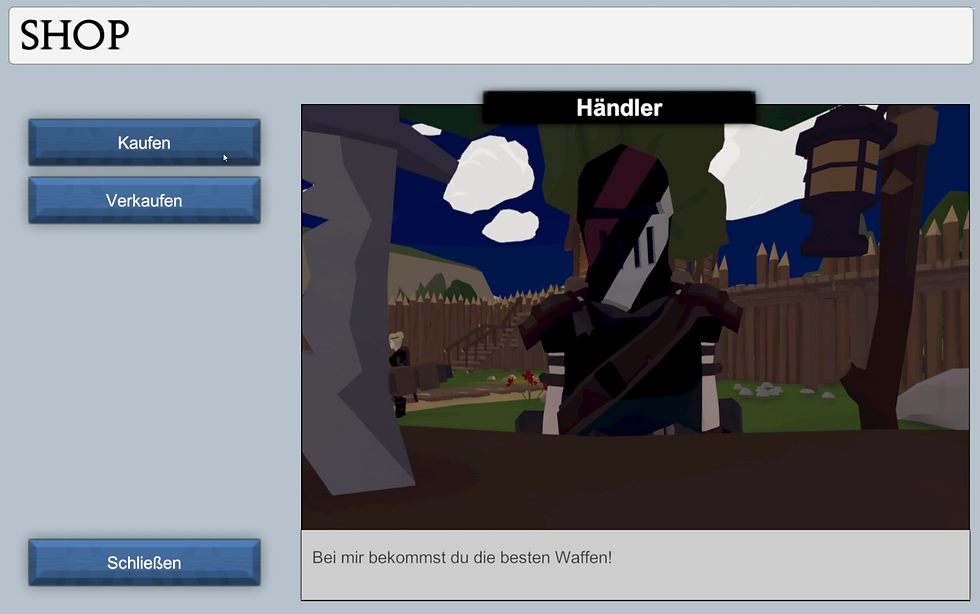
Shop UI with options to buy, sell, or end the conversation.
Shop UI displaying all items available for purchase, with a 3D view of the item and detailed information.
The camera renders only objects with this layer, creating a clean, immersive item preview displayed in the UI.
To the right, detailed information about the selected item is presented. This includes the item's price (either its cost when buying or its value when selling), a description providing background information or functional details, and its specific attributes. For instance, healing items show the amount of health restored, while weapons display how equipping them would affect the player’s attack power. These features combine to create a user-friendly, immersive shopping experience that complements the game’s overall design.
Shop UI with options to buy, sell, or end the conversation.
Shop UI displaying all items available for purchase, with a 3D view of the item and detailed information.

Two characters encounter an injured raccoon, triggered by an earlier player decision.
Two characters encounter an injured raccoon, triggered by an earlier player decision.
The player makes a choice, leading to a cutscene where they decide to pretend nothing happened instead of telling the truth.
Compass Marker: Position Calculation
// This method calculates the position of a mission marker on a compass UI based on the player's current position and forward direction.
public Vector2 GetPositionOnCompass(Marker marker)
{
// Retrieve the player's position as a 2D vector from the main camera's position in the game world.
Vector2 playerPos = new Vector2(mainCamera.transform.position.x,
mainCamera.transform.position.z);
// Retrieve the player's forward direction as a 2D vector from the main camera's forward vector in the game world.
Vector2 playerForward = new Vector2(mainCamera.transform.forward.x,
mainCamera.transform.forward.z);
// Calculate the signed angle between the vector pointing to the mission marker (from the player's position)
// and the player's forward direction. This represents the relative direction of the marker on the compass.
float angle = Vector2.SignedAngle(marker.position - playerPos,playerForward);
// Return the marker's position on the compass
return new Vector2(compassUnit * angle, 0);
}The GetPositionOnCompass method calculates the position of a mission marker on the compass UI, ensuring that objectives are accurately displayed relative to the player’s orientation. By converting both the player’s position and forward direction into 2D vectors, the method ensures compatibility with the compass system, which operates in a top-down perspective.
Vector2.SignedAngle determines the relative direction of the marker based on the player's current view, allowing for precise placement on the compass. The calculated angle is then scaled using compassUnit, ensuring that markers are positioned dynamically as the player moves and turns. This approach provides an intuitive navigation aid, enhancing player orientation and mission tracking.
Two characters encounter an injured raccoon, triggered by an earlier player decision.
The player makes a choice, leading to a cutscene where they decide to pretend nothing happened instead of telling the truth.
Saving Game Data
// Saves the current game data
public void Save()
{
// Checks if the directory for saving game data exists; if not, creates it
if (!Directory.Exists(Application.persistentDataPath +"/SaveData" + path))
{
Directory.CreateDirectory(Application.persistentDataPath +"/SaveData" + path);
}
// Creates an instance of SaveObjectManager which handles the data to be saved
SaveObjectManager sOM = createSaveObjectManager();
// Converts the SaveObjectManager instance to a JSON string
string JsonString = JsonUtility.ToJson(sOM);
// Creates a StreamWriter to write the JSON data to a file
StreamWriter sw = new StreamWriter(Application.persistentDataPath + "/SaveData" + path +
"/game_data.text");
// Writes the JSON string to the file
sw.Write(JsonString);
// Closes the stream after writing to ensure data is properly saved
sw.Close();
}The Save method ensures that the player's progress is securely stored, allowing them to continue their game seamlessly after closing and reopening it. By converting the game state into a structured JSON format, the system can efficiently store and retrieve important data, such as the player’s inventory, mission progress, and world state.
To prevent data loss, the method first checks if the save directory exists, creating it if necessary. It then collects all relevant game data using a SaveObjectManager, transforms it into a JSON string, and writes it to a file. Closing the file properly ensures that the data is safely written and not corrupted. This system provides a reliable way to manage game saves, enabling a smooth player experience without worrying about lost progress.
Two characters encounter an injured raccoon, triggered by an earlier player decision.


